When I started gardening, the idea of raised beds felt a little intimidating. But as I dived into it, I realized just how rewarding and straightforward it could be. Raised beds not only make gardening easier but also provide the perfect growing environment for vegetables. They’re a game-changer, especially if you’re dealing with poor soil or limited space.
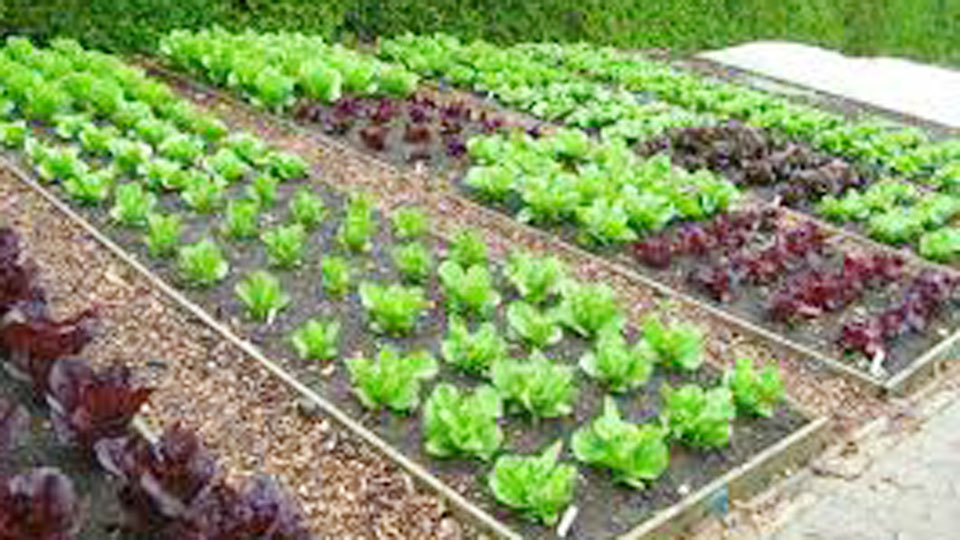
Image by luv2garden
If you’re a beginner or looking to refine your process, preparing a raised bed the right way sets the stage for a bountiful harvest. Let me walk you through everything you need to know to prepare a raised bed for planting vegetables.
Why Choose Raised Beds for Vegetables?
Before we dig into the process, let’s talk about why raised beds are worth the effort. For me, raised beds solved several problems at once: poor soil quality, limited space, and back pain from bending over too much. Here are some benefits:
- Improved Soil Quality: You have complete control over the soil, making it easier to provide the nutrients your plants need.
- Better Drainage: Excess water drains quickly, preventing root rot.
- Fewer Weeds: Since you’re adding fresh soil, you’ll encounter fewer weeds compared to traditional garden beds.
- Easier Maintenance: Raised beds are easier on your back and knees, especially if you build them taller.
- Extended Growing Season: The soil in raised beds warms up faster in the spring, allowing you to plant earlier.
Choosing the Right Location
The location of your raised bed plays a significant role in your garden’s success. Vegetables thrive in plenty of sunlight, so choose a spot that gets at least 6-8 hours of direct sunlight daily.
If possible, position your bed where it’s sheltered from strong winds but still has good air circulation. And make sure it’s easily accessible for watering, harvesting, and maintenance.
Building or Buying a Raised Bed
You have two options: building your own raised bed or buying a pre-made one. I’ve tried both, and they each have their perks.
Building Your Own Raised Bed
If you’re handy with tools, building your own raised bed can be cost-effective and customizable. Use untreated wood, bricks, or concrete blocks. Avoid treated wood, as it can leach harmful chemicals into the soil.
Buying a Pre-Made Raised Bed
If DIY isn’t your thing, pre-made raised beds are widely available. They come in various materials like wood, metal, or plastic and are easy to assemble.
Preparing the Base
The first step in preparing your raised bed is creating a solid foundation. This step ensures proper drainage and keeps weeds from creeping in.
- Clear the Area: Remove any grass, weeds, or debris from the chosen spot.
- Level the Ground: Use a rake or shovel to level the area where your bed will sit.
- Add a Barrier: Lay down cardboard or landscape fabric to suppress weeds.
Choosing the Right Soil
The quality of your soil is the most critical factor in growing healthy vegetables. Unlike in-ground gardening, raised beds let you create the perfect mix.
The Ideal Soil Mix
Here’s a simple recipe for raised bed soil that has worked wonders for me:
- 50% Topsoil: Provides structure and basic nutrients.
- 30% Compost: Enriches the soil with organic matter and nutrients.
- 20% Aeration Material: Add materials like coarse sand or perlite for improved drainage.
Mix these ingredients thoroughly before adding them to your bed.
Filling Your Raised Bed
When filling your raised bed, don’t just dump in soil and call it a day. Layering is key to creating a thriving growing environment.
Layering Your Bed
- Bottom Layer (Organic Matter): Start with twigs, branches, or straw. This layer improves drainage.
- Middle Layer (Compost): Add kitchen scraps, grass clippings, or shredded leaves.
- Top Layer (Soil Mix): Finish with your prepared soil mix.
This layered approach mimics natural soil systems and provides a rich, well-drained growing medium.
Adding Nutrients
Vegetables are heavy feeders, so it’s essential to add extra nutrients to your soil. Even if your compost is rich, additional amendments can give your plants a head start.
Some great options include:
- Bone Meal: Boosts phosphorus for root and flower development.
- Blood Meal: Adds nitrogen for leafy growth.
- Wood Ash: Provides potassium and raises pH if your soil is acidic.
Planning Your Planting Layout
When it comes to planting, spacing and companion planting can make or break your garden.
Companion Planting
Certain plants grow better when paired together. For example, tomatoes and basil thrive when grown side by side. On the other hand, avoid planting beans near onions, as they can inhibit each other’s growth.
Spacing Guidelines
Crowding your plants can lead to competition for nutrients and increased disease risk. Follow the spacing recommendations on seed packets or plant labels.
Planting Your Vegetables
Now comes the fun part—planting! Here’s how to get started:
- Dig Small Holes: Use a trowel to dig holes that match the depth and spacing requirements of your plants.
- Plant Seeds or Transplants: Place seeds or seedlings in the holes and cover them gently with soil.
- Water Thoroughly: Give your plants a good drink to settle the soil around their roots.
Watering Your Raised Bed
Raised beds dry out faster than traditional gardens, so consistent watering is essential. I recommend installing a drip irrigation system or soaker hoses for even watering.
Always water in the morning to reduce evaporation and minimize the risk of fungal diseases.
Mulching for Moisture and Weed Control
Mulching is one of the easiest ways to keep your raised bed in top shape. Apply a layer of organic mulch, like straw or wood chips, around your plants. This helps retain moisture, suppress weeds, and regulate soil temperature.
Maintaining Your Raised Bed
Regular maintenance keeps your garden thriving. Here’s what I do:
- Weed Weekly: Pull out any weeds that manage to sneak in.
- Inspect Plants: Check for pests or diseases and address issues promptly.
- Replenish Nutrients: Add compost or organic fertilizers every few weeks to keep the soil rich.
Seasonal Preparation
Raised beds require some care between growing seasons. After harvesting, remove any remaining plant debris and top off the soil with fresh compost. Cover the bed with a tarp or mulch to protect it during the winter.
Conclusion
Preparing a raised bed for planting vegetables may seem like a lot of work, but trust me, it’s worth every bit of effort. Once you’ve set up your bed, maintaining it becomes a breeze. Plus, there’s nothing more satisfying than harvesting fresh, homegrown veggies.
If you’ve been hesitant to try raised bed gardening, let this be your sign to dive in. With the right setup and care, you’ll be enjoying a thriving vegetable garden in no time.
FAQ
What is the best soil mix for raised beds?
A good mix includes 50% topsoil, 30% compost, and 20% aeration material like sand or perlite.
How deep should a raised bed be for vegetables?
A depth of 12-18 inches is ideal for most vegetables.
Do I need to line the bottom of my raised bed?
It’s not mandatory, but lining with cardboard or landscape fabric can help suppress weeds.
How often should I water a raised bed?
Watering depends on weather and soil type, but generally, raised beds need watering 2-3 times a week.
Can I grow root vegetables in a raised bed?
Yes, root vegetables like carrots and radishes thrive in the loose, well-drained soil of a raised bed.

I’m Marissa Lynn, the proud author behind GardeningProperty.com! With a deep-rooted passion for all things green and growing, I’ve dedicated years to mastering the art and science of gardening.
From nurturing vibrant flowerbeds to cultivating thriving vegetable gardens, I love sharing practical tips, creative ideas, and proven techniques to help others create their dream outdoor spaces.